This is a bit of a long-winded post but I had a major issue with my laptop which caused me a lot of stress and annoyance, this is my experience of the issue and a fix for anyone who may come across it in the future
The Issue
Last summer I ran a semi-routine clean install on my 2018 MacBook Pro. This involves the following steps (in the given order):
- Creating a USB installer with the latest macOS Catalina.
- Booting into the USB (Pressing Option key on boot).
- Using the Disk Utility, erasing the Disk and formatting it as APFS with a GPT partition scheme.
- Using the Terminal, unmounting the disk diskutil unmountDisk disk0, where disk0is the internal NVME drive.
- Using the Terminal, Running gpt destroy disk0where disk0.
- Running diskutil zeroDisk disk0.
- Once that process is complete, I use the Disk Utility application to reformat as APFS and install macOS.
Nothing super crazy, maybe a few redundant steps, maybe a little overkill, maybe a little unnecessary.
However, on the final step where I format it as an APFS drive, it failed in creating the APFS container and comes up with an Internal State Error. It appears to first format the disk as Mac OS Extended (Journaled) then create an APFS container, then add an APFS Volume, which fails when adding with An internal error occurred.
I tried many things to remedy it, including:
- Securely erasing the drive diskutil secureErase 0 disk0.
- Simply zeroing the disk again diskutil zeroDisk disk0
- Reformatting the drive as other things, such as ExFAT/ FAT/ MacOS Journaled, then trying to format as APFS.
- Reformatting the drive through the command line instead: diskutil eraseDisk JHFS+ NAME disk0→ diskutil apfs createContainer /dev/disk0s2→ diskutil apfs addVolume disk0s2 APFS NAME(It failed here, with Error starting APFS Container creation: The given disk is not an APFS Container Reference (-69630), even though I just made a container there.)
- diskutil apfs addVolume disk24 APFS NAME also fails with Error: -69624: Unable to add a new APFS Volume to an APFS Container
- Reformatting the drive using this: diskutil eraseDisk APFS NAME disk0
- Restarting and trying these again.
- Using a different installer than the USB (The one from Command + R, Command + Shift + R, and whatever the other combo is), and trying these again.
I could format it as JHFS+, but it wouldn’t let me install the OS to such a formatted volume, as it’s pretty outdated.
I even tried to get into the laptop using Linux on my main PC, but since Apple has kept APFS closed source, I didn’t get very far with that.
Fsck and first aid both report no problems, it could format to any other type, just not APFS, WTF WAS GOING ON??
Apple Support
During this ordeal, I called Apple support many times, for about two months in total over which I spoke to 3 different “senior” engineers - none of whom could rectify the problem remotely. One of them told me I should bring it in to an Apple store, which was not possible due to the Covid situation, but that I could ship it to an Apple repair center they could get it repaired free of charge. The second engineer told me that I had to make a deposit of £600; which is the total price of a full logic board replacement and that I could not simply get a diagnosis. If they found out that the logic board was the problem, I would have to pay the full £600 for the repair. This is not ideal because, knowing Apple, the easiest fix is always a replacement. Eventually, after some research, I discovered the consumer law, which states that if the issue has been present since manufacture and you’re on the device for less than five years you are eligible for a free repair
It’s a lot cheaper to keep existing customers happy than it is to acquire a new one, and so after stating this they seemed a lot more eager to help me out in any way they could.
I ended up sending the laptop to a third-party Apple-authorized repair center which replaced the logic board as well as a free battery GPU and keyboard replacement, I’m not sure why but I’m not complaining.
The Fix
When I got my laptop back a month later, I was determined to investigate further what caused this issue in the first place, so that I may be able to help anyone who faces it in the future. It was a very obscure error message that didn’t come up in any of Apple’s internal documentation, however is a very nasty one to get.
I managed to narrow it down to a problem in the T2 Security Chip, which was implemented in the 2018 later MacBooks. Luckily, Apple has a nifty piece of software called Configurator 2 that can just wipe out the T2 issues completely.
In very rare circumstances, such as a power failure during a macOS upgrade, a Mac may become unresponsive and so the firmware on the Apple T2 Security Chip must be revived. A revive updates that firmware. A revive is designed to not make any changes to the startup volume, the user’s data volume, or any other volumes.
Sounds perfect, doesn’t it?
Requirements
To perform this process, you must have:
- The latest version of Apple Configurator 2 installed on a second Mac device with internet access
- A supported USB-C to USB-C charge cable
- A supported USB-A to USB-C cable
The USB-C cable must support both power and data. Thunderbolt 3 cables aren’t supported.
The Pseudo Process
The revive or restore process involves the following steps:
- Launching Apple Configurator 2 on the second Mac and connecting the Mac computers
- Restarting the Mac using a special key sequence
- Using Apple Configurator 2 to revive the firmware or restore the firmware and erase all volumes
Step 1: Set up the working Mac with Apple Configurator 2 and connect the USB-C cable
- Verify that:
- You have the latest version of Apple Configurator 2 installed
- The Mac with Apple Configurator 2 is plugged into a power source
- It is connected to the internet
- Plug in (along with any adapters needed) the USB-C cable.
- Launch Apple Configurator 2.
Step 2: Prepare the Broken Mac
- Press the Sleep/Wake button for about 5 seconds to shut down the Apple notebook computer.
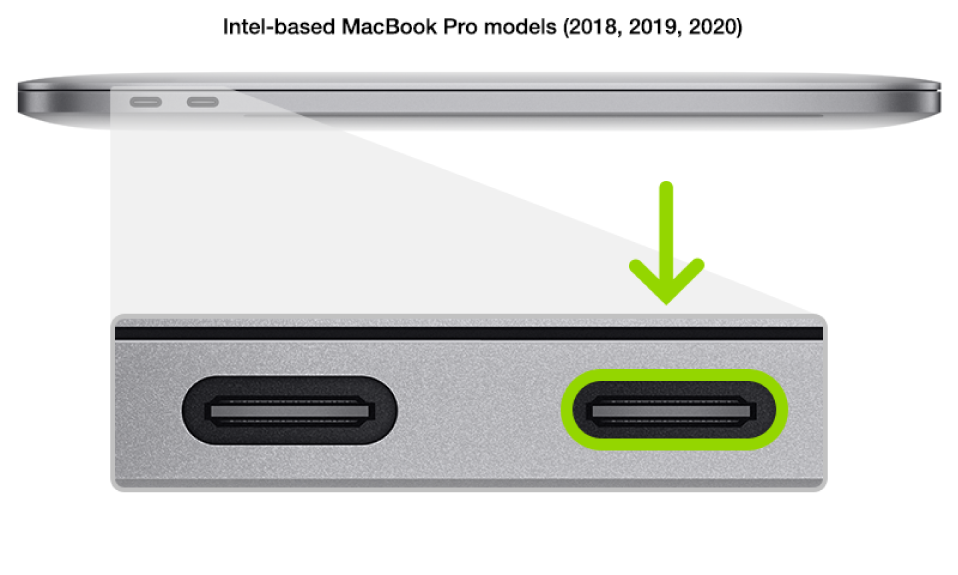
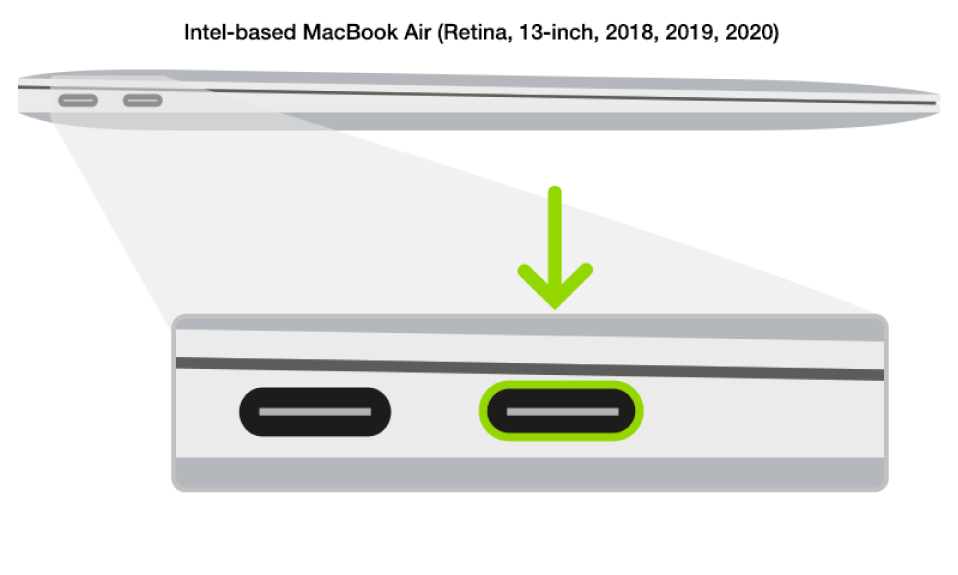
- Plug the USB-C cable into the front Thunderbolt port on the left side of the Apple notebook computer.
- While holding down the power button, at the same time press all three of the following keys for about 3 seconds: ◦ The right Shift key ◦ The left Option key ◦ The left Control key Note: You won’t see any screen activity from the computer.
Step 3: Revive the firmware
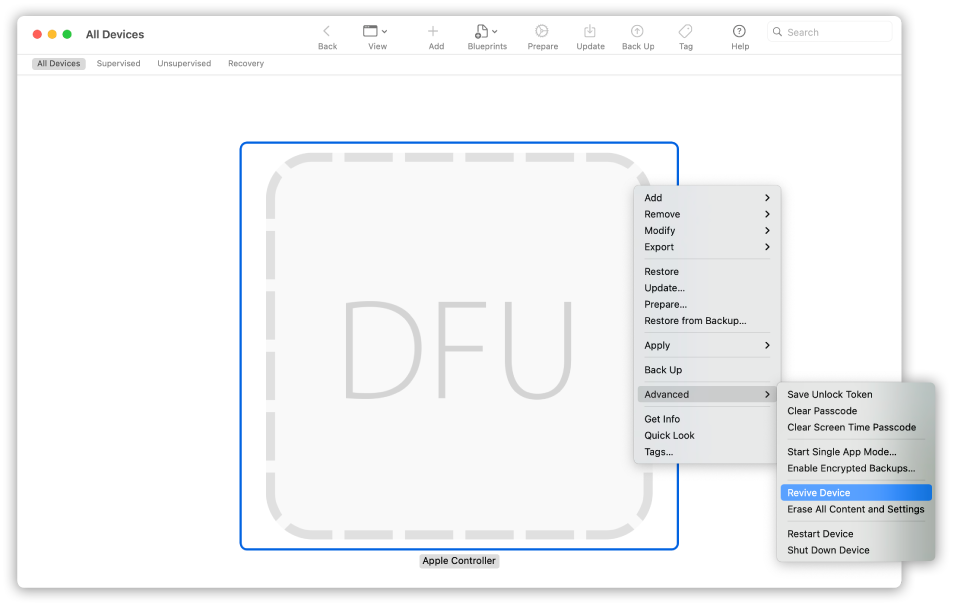
- In the Apple Configurator 2 device window, select the Mac whose chip firmware you want to revive.
- Do one of the following:
- Choose Actions > Advanced > Revive Device, then click Revive.
- Control-click the selected device, then choose Advanced > Revive Device, then click Revive.
- Wait for the process to complete. During this process, an Apple logo will appear and disappear.
- After the process completes, your Mac will reboot.
- If necessary, use macOS Recovery to reinstall macOS. (See the Apple Support article How to reinstall macOS from macOS Recovery.)
- Quit Apple Configurator 2, then unplug any adapters and cables.
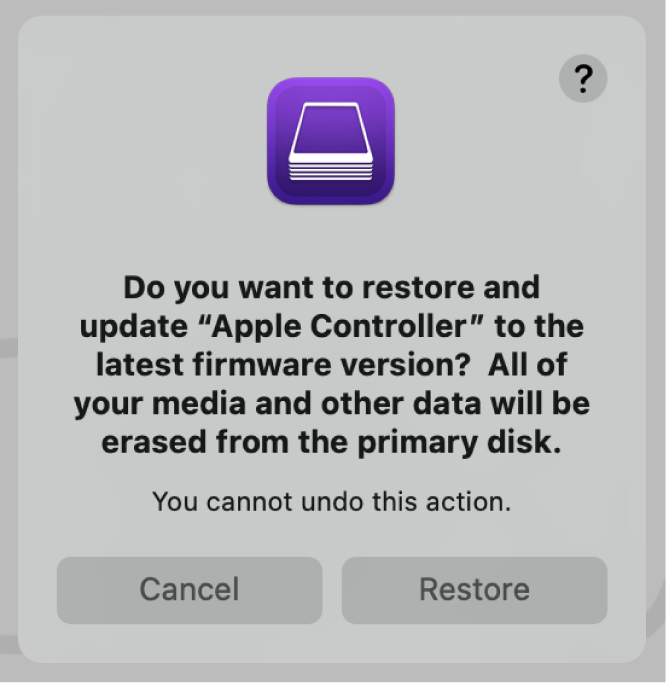
Optionally, you can choose to restore the device to default and erase everything:
TLDR
If you receive the errors 69832, 69630, or 69624, or cannot format the disk as APFS, use Configurator 2 to restore the T2 chip and sort it out!
After this, you’re free to reset your MacBook and get on with your day. I may even consider using Configurator 2 in the erase process when it comes to selling my laptop, just as an added layer of security.